February 17, 2023
How to take better landscape photos: Since the dawn of landscape photography, artists have constantly been pushing the limits and breaking barriers to create the most beautiful photographs known to humans. A big part of the evolution of landscape photography has been influenced by the insane technological advancements in camera equipment. However, the basic principles of composition still hold true all these years later.
So, if you are wondering how to take better landscape photos as an amateur or intermediate photographer, you've come to the right place. Over the last ten years, I've been a photographer developing my skills, trying new and exciting techniques, and searching for the next great landscapes to shoot. Over that time, I've learned much about what's worked and what hasn't, so I felt compelled to assemble this guide for those looking to take their work to the next level.
And while I'd love to claim that these tips are a surefire way to elevate your photo game, I must disclaim that these are merely my opinions expressed, and though they work for me, they might not work for you. But, in any case, let's get into my six tips for taking better landscape photos.
The history of landscape photography is long and varied, with the earliest known examples dating back to the early 19th century. Early landscape photographers often used large format cameras and long exposures to capture the beauty of the natural world.
In the mid-1800s, photographers such as Gustave Le Gray and Carleton E. Watkins pioneered using large format cameras and long exposures to capture the grandeur of nature. Their works often documented the natural beauty of places that had been overlooked or ignored.
In the early 20th century, photographers such as Ansel Adams and Edward Weston began to explore the medium's potential, experimenting with composition and light to create powerful and iconic images of the American West. Adams and Weston were instrumental in popularizing the concept of "straight photography," which focused on capturing scenes as they appeared in reality rather than manipulating the image in the darkroom.
In the late 20th century, photographers such as Galen Rowell and Eliot Porter began to explore the potential of color photography in landscape photography. They were particularly interested in capturing the subtle details of the natural world, often using long exposures and soft focus to convey the beauty of the environment.
Today, landscape photography continues to evolve and explore new techniques and perspectives, such as drone photography and HDR imaging. Contemporary photographers such as Peter Lik and Frans Lanting have pushed the boundaries of the medium, creating unique and visually stunning images of the natural world.
Capturing great landscape photos is a rewarding experience in several different ways. First and foremost, landscape photography allows you to capture the beauty of nature in a way that is unique to you. It also allows you to practice your skills and develop your craft without needing a human subject, which can be intimidating for amateur photographers.
You can experiment with different composition techniques, use various lenses, and learn how to make the most of your shooting environment at a pace that works for you. In addition, great landscape photos can be appreciated by others, allowing you to share your vision and perspective with the world.
My favorite part of landscape photography is that it allows you to become more in tune with nature and observe the details and nuances of the environment you would usually overlook. These photos are a great way to freeze seemingly insignificant moments in time in a beautiful way that you can look back on and remember fondly.
Social media has had a massive influence on landscape photography. It has opened up an entirely new way for photographers to share and promote their work, allowing them to reach a global audience. Using platforms such as Instagram and Vero, photographers can post their photos and immediately have them seen by people from all over the world.
They can also use hashtags to ensure their images are seen by people interested in the same topics, though this is more true for smaller networks like Vero than Instagram. This has helped to popularize landscape photography, as it is now easier than ever to find and appreciate photos of beautiful scenery.
Social media has also allowed photographers to connect, enabling them to discuss techniques, share tips, and develop lifelong friendships. Social media has also allowed photographers to create a brand for themselves by creating an impressive portfolio by regularly posting their photos. Many amateur photographers have leveraged social media to turn their passion for photography into a full-time career.
As with anything, social media has also had some adverse effects on landscape photography. Because it is so easy to share your work with the world, the landscape photography market has become disgustingly oversaturated. Everyone thinks they're professional photographers these days, making it much harder for truly talented artists to break through all the noise.
In addition, using geotags on social media platforms has serious adverse effects on many natural environments that cannot handle a sudden influx of visitors. While I'm all for geotagging locations to spread awareness of their beauty, I think it's essential to do so responsibly and always put the environment first. If it is a fragile ecosystem with no infrastructure to support mass tourism, try to avoid geotagging the specific location and reference a more general area instead.
Knowing the ins and outs of your camera as a landscape photographer is essential to capture the perfect shot. By understanding the features and settings of your camera, you can adjust them to capture the best possible images. For example, by understanding the ISO setting, you can adjust it to the appropriate level to get the sharpest and clearest images.
You can also adjust the shutter speed and aperture to achieve the desired depth of field and motion blur. Additionally, by understanding your camera’s metering system, you can ensure that the correct exposure is achieved.
Another critical aspect of knowing your camera is understanding the lenses available. Different lenses can produce different results, so knowing which lenses are best for specific subjects and environments is essential. As a landscape photographer, you may need a wide-angle lens to capture expansive views or a telephoto lens to capture distant subjects.
Understanding the various filters available can help achieve specific effects, such as neutral density filters to reduce the amount of light entering the lens and polarizing filters to reduce glare and reflections. Finally, understanding your camera's features can help you be more creative with your photography. You can create unique and visually appealing images by experimenting with different settings and techniques.
The truth to this question is that the best camera and lens for your landscape photography depend entirely on what you are trying to achieve. If your goal is simply to post to social media for fun, you might want to avoid spending an arm and a leg on gear.
On the other hand, if photography is currently or soon to be your profession and/or printing your work is crucial, it is worth investing in a decent setup. Generally speaking, newer mirrorless cameras are fantastic for amateurs and emerging professionals because top brands will continue to make and improve these for the foreseeable future.
I, for one, am a huge fan of Sony (see my gear list here), but I also adore Canon products. I don't love Nikon because I feel they are always one step behind Sony and Canon, but brand preference is precisely that: a preference. But no matter how you slice it, any of the mainstream camera manufacturers sell fantastic products, so you can't go wrong.
When starting out, it is a good idea to learn the generally-accepted rules of creative composition. A lot of people wonder why they need to learn so-called "rules" for making art, and while it's a valid point, let me take a stab at answering the importance of why.
Art, like anything, takes practice. An excellent way to think about the "rules" of photography is to compare them to scales and chords in music. Most people don't just pick a frequency and play what their heart desires. Sure, the music pioneers must've done something similar, but modern music revolves around 12 basic notes and it just seems to work.
So rather than starting from absolute zero, we can apply the same concepts to photography. Principles like the rule of thirds, leading lines, and the golden ratio are all great examples of "scales" in photography. Much like in music, artists don't often make hit songs by running through scales, but the scales are integral to establishing a unique style.
And the same can be said for photographers. It's helpful to study the "rules" of composition so you can develop a baseline for your skills and eventually push the boundaries into your own unique aesthetic.
The rule of thirds is a guideline used in photography and art to help create a balanced and visually pleasing composition. This rule states that an image should be divided into nine equal parts by two vertical and two horizontal lines. The four points formed by the intersecting lines are the ideal locations to place the important elements of the image, such as the subject or focal point. Here is an example of one of my photos where I used the rule of thirds:

As you can see, I didn't follow this rule strictly. I placed my main subject (the barn) on the right vertical line and the secondary subject (Grand Teton Mountain) on the opposite line, which created a sense of symmetry and depth.
But, where I skewed from this "rule" was that I did not place these subjects in the middle of the horizontal lines. Instead, I found this shot more appealing by placing both subjects inside the middle third. I felt that this composition gave the photo a highly balanced aesthetic: I broke the photo up into three sections on the vertical axis and two on the horizontal axis.
By following this "rule," a photographer can create an image that is composed in an aesthetically pleasing way that draws the viewer’s attention to the subject of the image. Additionally, the rule of thirds can help to create a sense of depth and movement in an image, even when capturing a stationary subject. By placing the subject off-center, the image has more visual interest, and the viewer’s eye is drawn to explore the remaining space in the image.
Again, this is not so much a rule as a generally accepted principle, so don't feel like you have to follow this practice for every photo you create. But it is a greatly accepted starting point for new photographers and artists.
Leading lines are the viewer's visual path when looking at a photograph. They are used to draw the viewer’s eye to a certain point or area within a photograph and can be used to create a feeling of movement, depth, and balance. Leading lines can be created with various techniques and elements, including perspective, lines of symmetry, and the direction of a subject’s gaze.
Leading lines can be created by using light and shadow, as well as using color, texture, and shapes. Additionally, leading lines can be created by using natural elements such as pathways, roads, fences, trees, and rivers. Leading lines are a great way to draw the viewer’s eye to the photograph's main subject and can be used to create a sense of depth and movement.
Let's take a look at one of my photos that I captured in Wyoming at almost 2 am:

As you can see, I also used the rule of thirds principle for this photo (my main subject is on the bottom third line). But in terms of leading lines, let's break down my process for this composition. I had my friend stand in the center of a staircase that led up to a cool lookout tower. I used the railing on the right side of the photo to guide the viewer's eye to the subject and did the same on the left side of the photo with the slope of the stairs.
I took it a step further in this photo by using a headlamp to direct the viewer's eye to the secondary subject, which is the milky way. Having my subject turn to his right and look up also created a sense of wonder, which I believe translates to the viewer. By using three different leading lines, I created movement and captured the viewer's attention for more than a brief moment (of course, that depends on what interest the viewer).
For anyone wondering, I used a 14mm prime lens for this photo and had my setting at f/1.8, ISO 6400, and a 25-second shutter speed.
This particular principle of composition is my favorite because it adds tremendous depth to a photo if used well.
The golden ratio is a mathematical concept often used in the visual arts, including photography, to create aesthetically pleasing images. In landscape photography, the golden ratio can be used to compose a shot to achieve a balanced, harmonious image. The golden ratio is based on the Fibonacci sequence, a series of numbers where each is the sum of the two preceding numbers (1,1,2,3,5,8,13,21, etc.).
The golden ratio is represented by the Greek letter phi (ϕ) and is equal to approximately 1.618. This ratio can create a balanced and eye-catching composition in a photograph by dividing the frame into two sections in a 1:1.618 ratio. For example, the golden ratio could be used in a landscape photograph to divide the sky from the landscape. The bottom portion of the frame should be 1.618 times larger than the top portion, creating an aesthetically pleasing composition.
This ratio can also divide the frame horizontally, with the left portion being 1.618 times larger than the right portion. The golden ratio can also create a focus in a landscape photograph. For example, suppose a photographer wants to draw attention to a specific part of the landscape. In that case, they can use the golden ratio to divide the frame into three sections, with the center section being 1.618 times larger than the two side sections. This will create a pleasing composition and draw the eye to the center of the frame.
I typically use this principle subconsciously, as it is the most challenging to visualize when taking photos. But let's take a look at one of my photos from the Grand Tetons where I didn't even realize I used the golden ratio:

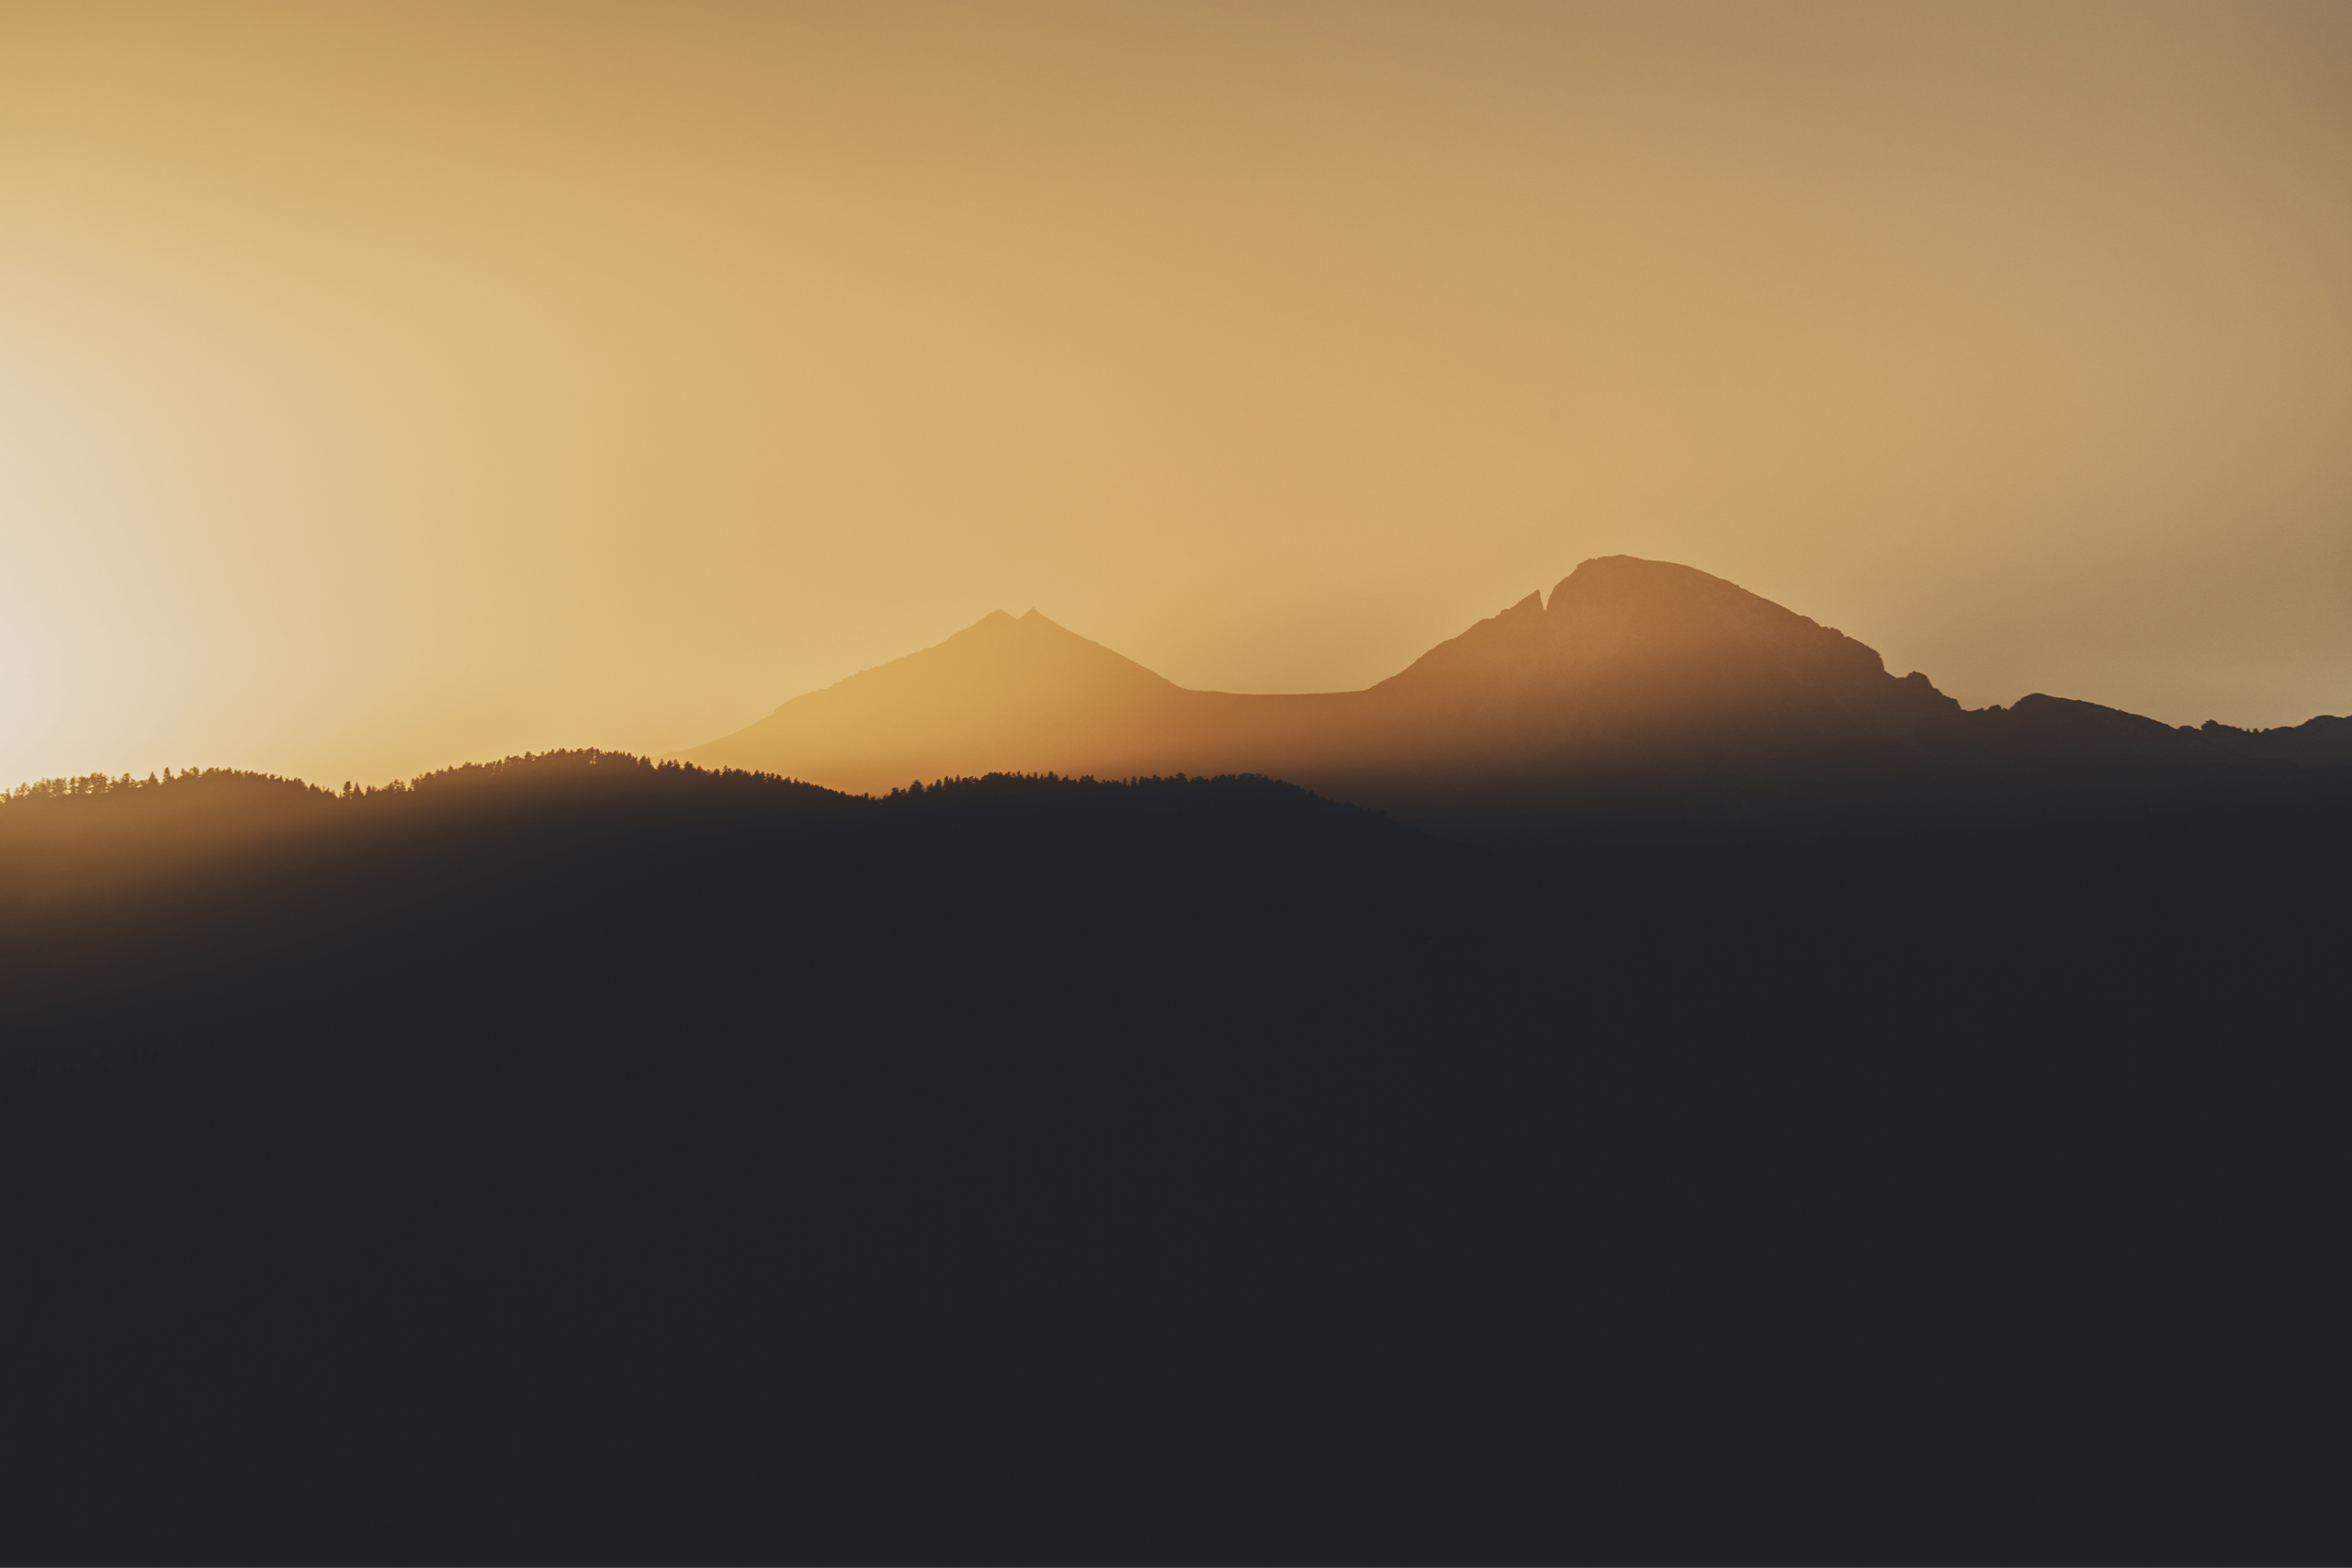
I captured this one of Buck Mountain in 2022, and in my mind, I found this particular composition extremely visually appealing. It just so happens that I was using the golden ratio subconsciously with regard to the placement of my main subject (the peak of Buck Mountain).
The two peaks in this shot are very close to being split into a 1.618:1 ratio of the scene, and the peak itself is lined up perfectly with the rest of the sequence. Again, I can't take credit for the composition of this scene with the intention of using the golden ratio, but over time, these principles become like second nature, so in this case, it all just fell into place.
This is my favorite rule of composition. Once you have a firm grasp on the basic rules of composition, you should start trying new things that completely break the rules. This is how artists develop their unique style and push the boundaries of photography, ultimately inspiring future generations to do the same.
Take this photo of mine for example:

I didn't use any of the above principles with this one, yet it is still a captivating photo. For me, one of my favorite things to do is create balance in my photos. With this one, I split the scene into three even sections. I was lucky that the tree line and the mountain peak created a perfectly symmetrical composition and, in doing so, also created an enormous sense of depth and scale.
Let's face it: lighting really is everything. Many photographers starting out opt to shoot during the middle of sunny days since it's typically much easier to navigate the outdoors in broad daylight without a spec of bad weather.
But the problem with shooting during the middle of a sunny day is that you will have to deal with harsh lighting, stagnant lighting, and the simple fact that daytime photography, overall, simply isn't that interesting when compared to golden or blue hour photography. Take this photo of mine, for example:

It's not bad, but I really had to make it more interesting with my color grade. Shooting on a sunny day doesn't make for a very interesting set of lighting conditions.
Before you scold me for stating a subjective sentiment as fact, ask yourself which landscape photos you are more drawn to: were they shot during the middle of a sunny day (if so, there's nothing wrong with that!), or were they shot during golden or blue hour or when there was weather afoot? While there's no correct answer, most people I know tend to be drawn more toward photos with exciting lighting and weather conditions.
Shooting during golden hour is important for capturing unique and beautiful landscape photos because it provides a soft and warm light that is optimal for taking pictures. The sun is lower in the sky, which results in a long and even shadow that adds depth and texture to the image. In other words, goodbye to harsh lighting and shadows!
The light also can create a warm and inviting atmosphere by adding a rich, golden hue to the scene. Additionally, the warm light can create a beautiful contrast between the sky and the earth, making the sky appear vibrant and the land rich and inviting. Here's a photo I captured during a sunrise in the Grand Tetons:

I love shooting during golden hour because I'm a huge fan of oranges and reds, and pinks in my photos because they always make my photos pop after editing. Not to mention, some of the insane cloud formations that can form during a sunrise or sunset are enough to make a grown me cry.
Let's compare that photo to one I captured during less-exciting lighting conditions:

It was an overcast day, so the lighting was still more interesting that a completely blue sky, but can you see how the previous example is much more exciting to look at than this one?
Blue hour is the time of day just before the sun rises and just after the sun sets. Shooting during blue hour can help you capture beautiful landscape photos because, like golden hour, the light is softer and more even, allowing photographers to capture the scene's mood. The sky is usually a beautiful blue color, creating a great backdrop to the landscape and a richly stark aura.
The shadows are longer, creating more dramatic and exciting compositions, and the colors of the landscape can be more saturated, creating a more vibrant and vivid look. Some people prefer blue hour over golden hour because of the uniquely cold temperature of the atmosphere, which can make for an instant mood fest.
I, for one, am more drawn to vibrant colors than stark blue tones, but it all depends on my mood and what vibe I'm looking for. Check out this photo I captured not too long ago during blue hour:

Obviously, I did a heavy color grade on this one, but there's something special about being outdoors after the sun sets behind the horizon. It's almost like the earth is falling asleep.
Many people seek to stay indoors and watch movies when the sky spits a depressing gray tone. But the truth is, some of my best photos have been captured during bleak overcast days. The biggest reason I love to shoot on overcast days is that the clouds act as a light diffuser, creating a soft and even glow without harsh shadows.
I also find low cloud formations my best compositional tool on overcast days because they can make a dull Colorado mountain peak into a mysterious castle of curiosity and angst. My favorite examples of overcast days used well in landscape photography can be found on nearly every popular landscape photographer's Instagram account: pretty much anywhere in Europe.
So next time you see the clouds rolling in, don't put away your camera; chase the overcast weather and see how beautiful nature can be in a softer light. Here's one I captured in Washington State in 2021:

Changing your perspective as a landscape photographer can help you capture better photos by allowing you to see the landscape from a different angle. This can be done by changing your vantage point, such as shooting from a higher or lower angle or moving to the side to get a different perspective. In other words, moving your body to avoid capturing another "standing human point of view photo."
Changing your perspective can help you capture more exciting compositions and elements of the landscape that may have otherwise gone unnoticed (although going prone might mess up your new shirt, you'd be surprised how different the world looks from down there).
Although traditionally, landscape photography called for a wide-angle lens, something I've been experimenting with a lot lately is using my telephoto lens. I find that using a unique focal length—in my case, usually between 135mm and 400mm—allows me to unlock totally new compositions I can't with a wide-angle lens.
I am a huge fan of minimalism in photography, and let's face it, wide-angle lenses are awesome for capturing a whole scene at once, but with that said, sometimes the scene can be overwhelming, making it hard to determine the subject.
When using a telephoto lens for landscape photography, I find it much easier to isolate subjects, creating a less-is-more aesthetic in my photos. This also makes it easier for others to appreciate my work since I try to make it impossible for them not immediately to recognize the subject.
Let's compare two photos I captured:

I captured this scene at 24mm. It's not a bad photo, but I wanted to get a slightly different perspective, so I shot this next one, which you've already seen, at 135mm:
I like that I have more control over isolating subjects with a telephoto lens, but of course you will need to decide which perspectives you prefer.
On the contrary, I like to challenge myself using one prime lens, such as a 50mm or a 35mm, when going on landscape photo expeditions. Prime lenses force me to be more creative and actually think before snapping a shot. The only downside with prime lenses is that you only get one focal length, and for the prices, getting multiple primes adds up quickly. See my post about prime lenses vs zoom lenses.
My drone helps me capture some of the most unique photos I would have ever thought possible. And while I can't recommend a drone for everyone, I will say that it certainly helps me see the world from a new and exciting perspective. See this photo for example:

I photographed this piece of land in Colorado from a birds-eye-view. Take a look at how it looks from a different angle, also shot from my drone:

Drones have, without a doubt, revolutionized the world of photography, allowing the average person to see the world from insane vantage points without the need for a helicopter tour, which usually costs an arm and a leg.
But before you go out and buy a drone, I can't stress enough the importance of understanding the rules of the air before you make your maiden voyage. There are strict laws that need to be followed regarding maximum altitudes, no-fly zones, and flying over people (don't do that; it's a dick move, and it's also against the law unless the people have agreed to let you fly over them).
Aside from all the rules and regulations, the other downside to drone photography is the cost of the drones themselves. But if you're a professional or extreme hobbyist, the price is well worth the results you will be able to produce.
Shooting photos in RAW is important for producing higher-quality landscape photos because it gives photographers more control over their images. RAW files contain more information than standard JPEG files, allowing photographers to adjust to exposure, white balance, color, and contrast without sacrificing image quality.
Additionally, RAW files retain more detail in the shadows and highlights, allowing photographers to create more dynamic and detailed images. By shooting in RAW, photographers can also produce much larger prints without losing quality, making them ideal for large-scale prints.
RAW files are a type of digital image file that contains minimally processed data from a digital camera. The RAW file format is an untouched and unprocessed data collection from the camera’s sensor. Unlike other image formats such as JPEG or TIFF, RAW files are not processed and therefore contain all of the information from the original photo.
Professional photographers and image editors prefer RAW files because they offer greater flexibility and control regarding post-processing. Because RAW files contain all the data from the original photo, users can change exposure, white balance, and other settings and retain all of the data from the original photo. This allows users to make adjustments without compromising the quality of the image.
Additionally, RAW files are typically much larger than other file types and therefore can produce larger prints with greater detail and clarity. Overall, RAW files are a powerful tool for photographers and image editors, allowing them to adjust the image and retain all of the original data. This makes it easier to produce prints with greater detail and clarity and makes it possible to make adjustments without compromising the quality of the image.
To give you an idea of a RAW photo versus a final edit, check out this photo from one of my old presets packs:

As you can see, RAW files are typically far more desaturated and flatter than JPEGs, but as mentioned above, they store much more information allowing photographers to edit them to perfection in post.
To take things a step further, I remove all saturation, contrast, and sharpening that is automatically applied to RAW files (I set a custom creative profile in my camera) because this allows me to edit my photos in my own style more easily.
Choosing a great photo-editing software for landscape photography is important because it allows you to take your photos to the next level. With the right software, you can bring out the best in your photos, create stunning effects and make them look professional. You can adjust exposure, contrast, and color balance to create the perfect photo look and feel. Editing software also allows you to crop, resize and rotate your photos to make them perfectly fit your vision.
Although some traditional photographers might turn their noses up at heavy post-production, those who develop a unique editing style often stand out on social media when attempting to build their own photography business.
I'm a huge perfectionist, so I also like to take advantage of the spot-healing brush in Photoshop, allowing me to remove all distractions and imperfections from my photos.
Knowing the ins and outs of your photo editing software is essential for creating great landscape photos. With a deep understanding of the tools and features available, you can make subtle adjustments to enhance your photos' colors, contrast, and lighting to bring out their best qualities.
You can also use the software to remove distractions from the background, sharpen details, and even add special effects like vignettes or graduated filters. The more you know about your editing software, the more creative you can be in your landscape photography, and the better the end result will be. My preferred software for color grading is Adobe Lightroom Classic.
Developing a unique editing style for your landscape photos is important because it will help them stand out from the crowd and give them a recognizable look. It will also help create a consistent style for your work, giving your portfolio a more professional and uniform feel. This consistency will make viewers more likely to remember your work and help you build a recognizable brand and social following.
Take a look at Benjamin Hardman's work; he has a very unique style that I and many others love and can easily recognize in a crowded Instagram feed.
To take better landscape photos, it's important to understand your camera and its settings to know how to make the most of it. Learning the rules of composition, like the rule of thirds, leading lines, and symmetry, can help you create a more aesthetically pleasing image. Shooting in an interesting light, like golden hour or blue hour, can help create more dynamic and impactful visuals.
To produce unique images, look for new perspectives, such as shooting from different angles or using a drone. Shooting in RAW will give you the most control regarding editing in post-processing. Having a strong editing style will help you create consistent photos to develop a recognizable portfolio.
Although "better" is a subjective term, by following these tips, you will surely notice improvements in your landscape photography in no time. Remember that art is not a science; therefore, no formula exists to make the "best" piece or pieces of art.
These tips are meant to be a solid starting point to help those looking to break into photography. The more you shoot, the more you will see your artistic vision breaking through in your work. And at the end of the day, your art is your art alone; don't let anyone tell you how to create your photographs if it means you must compromise on fulfilling your artistic spirit.
Get out and shoot. You will never be great unless you put in the work and realize that successful artists only forge their success on countless trials and errors. Thanks for reading, and I hope you found these tips helpful!